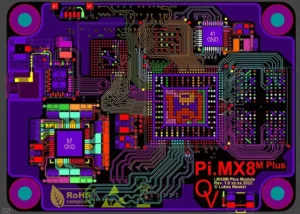
In PCB layout design, the vast majority of engineers focus on core challenges such as high-speed impedance, equal-length matching, and stackup architecture, while consistently overlooking fundamental details such as trace corner shapes, trace width consistency, and spacing compliance.
These seemingly insignificant routing details are, in fact, the core hidden causes of short circuits, open circuits, impedance drift, signal reflections, excessive EMC radiation, insufficient current-carrying capacity, excessive temperature rise, and low yield rates in mass production.
Conventional DRC checks can only detect basic violations and are unable to identify hidden issues such as corner distortion, subtle variations in trace width, missing solder mask bridges, and critical spacing thresholds.
From a practical engineering perspective, this article provides an in-depth analysis of common pitfalls in PCB layout—including corner handling, trace width and spacing—covering underlying principles, process adaptation standards, and differentiated specifications for high-speed and low-speed applications.
Accompanied by multiple sets of quantitative comparison tables, case studies of design errors, and mass-production optimization strategies, it comprehensively addresses gaps in layout details to prevent mass-production failures.
The full text is approximately 5,000 characters and is suitable for hardware engineers, layout engineers, and process verification personnel to save and reuse.
Many layout engineers have a misconception: as long as the DRC reports no errors, the routing is considered acceptable.
However, in actual mass production scenarios, many PCBs that functioned normally during prototype debugging and showed no anomalies in small-batch testing frequently exhibit complex issues—such as short circuits, micro-open circuits, high-speed signal bit errors, excessive power supply temperature rise, and moisture-induced leakage—once mass production begins.
Upon investigation, it was found that more than 80% of these failures stemmed from detailed design defects in corners, trace widths, and trace spacing.
Corners, trace widths, and trace spacing are the fundamental building blocks of PCB routing; they also serve as the foundational pillars for signal integrity, power integrity, and manufacturability.
For low-speed, standard traces, the impact of such design flaws is minimal; however, for high-speed signal traces, high-current power traces, and high-voltage insulated traces, even a single oversight can escalate from a “design flaw” to a “mass-production failure.”
90° right-angle turns cause sudden impedance changes; abrupt transitions between wide and narrow traces lead to signal reflections; critical trace spacing causes solder mask bridges to collapse;
And insufficient trace width results in current overload and temperature rise.
These issues cannot be detected by conventional DRC checks and represent widespread design blind spots in the industry.
PCB Routing Corners: 90-Degree Corners Are Not Only a Design Violation, but Also Pose Risks for High-Speed Circuits and Mass Production
Trace corners are among the most fundamental yet most commonly overlooked design details.
While most engineers know to “avoid 90° corners whenever possible,” they are largely unaware of the specific impacts that right angles, acute angles, obtuse angles, and curved corners have on signal quality, PCB manufacturing processes, and insulation performance.
They also lack an understanding of the differentiated corner specifications required for high-speed versus low-speed, and high-frequency versus high-voltage scenarios—leading to persistent design flaws.
The Underlying Hazards of Four Types of Trace Corners (Essential Knowledge for Engineers)
1. 90° Right-Angle Corners (The Most Common High-Frequency Misconception):
The outer copper foil of a right-angle corner forms a sharp corner.
During PCB etching, etchant accumulates in this sharp corner area, making it highly prone to over-etching—which thins the copper foil and causes trace impedance drift.
Meanwhile, copper residue accumulates on the inner side, forming burrs that can easily lead to micro-short circuits during mass production.
In high-speed signal applications, right-angle turns cause abrupt changes in the transmission line cross-section and alter the equivalent dielectric constant, leading to localized impedance imbalance, signal reflection, and jitter, which degrade high-speed eye diagram quality.
2. Sharp Corners (≤90°, Severe Violation):
Electric fields are highly concentrated at sharp corners, making it extremely likely to cause air breakdown and surface creep in high-voltage circuits, resulting in leakage and arcing failures.
Additionally, etching sharp-corner traces is extremely difficult; it is nearly impossible to fully preserve the copper foil at the tips, leading to extremely high defect rates for broken traces and “thin-neck” defects in mass production.
The use of sharp corners is strictly prohibited in high-speed signal applications.
3. Standard Obtuse-angle Corners (90–135°, Transitional Solution):
While obtuse-angle corners pose far fewer risks than right angles and acute angles, trace deformation still occurs at the corners, preventing fully continuous impedance.
They are suitable only for standard low-speed, low-frequency traces and are not recommended for high-speed, high-precision signal routing.
4. 45° Chamfered/Circular Arc Corners (Optimal Solution for Mass Production):
45° chamfered traces provide a smooth transition with no sharp corners or copper buildup, and are compatible with PCB etching processes;
Circular arc corners offer the best impedance continuity, completely eliminating local impedance spikes, and are the only compliant solution for high-speed differential, high-frequency clock, and RF signals.
Comparison Chart of Cabling Standards and Don’ts for Different Scenarios and Corners
| Routing Scenario | Recommended Corner Design | Prohibited Design | Key Risks | Engineering Requirements |
|---|---|---|---|---|
| High-Speed Differential / Clock / RF Signals | Rounded corners (radius ≥ 2× trace width) | 90° corners and sharp angles | Impedance discontinuities, signal reflections, and excessive common-mode noise | Eliminate all 90° corners along the routing path. Ensure smooth traces without abrupt geometric changes. |
| General Low-Speed Signal Traces | 45° chamfered corners | Sharp angles and densely packed 90° bends | Poor etching quality and potential micro-short circuits | A small number of 90° corners may be tolerated, but closely spaced corners must be chamfered. |
| High-Current Power Traces | 45° chamfers or large rounded corners | Sharp corners and narrow-neck bends | Current crowding, excessive localized temperature rise, and trace burnout | Prevent current concentration at sharp corners and maintain uniform current-carrying capacity. |
| High-Voltage Insulated Traces | Smooth corners with a large radius | All sharp corners | Electric field concentration, creepage breakdown, and current leakage | Increase spacing between corners and eliminate sharp conductor tips. |
PCB Trace Routing: Corner Design Guidelines
The Three Most Easily Overlooked Hidden Details at Corners
Detail 1: Slight Adjustments to Trace Width at Corners, Leading to Hidden Impedance Mismatch:
When routing, many engineers force traces into corners to fit the layout, causing the trace width to narrow unintentionally and creating a hidden “bottleneck.”
Conventional DRC only checks the line width of straight segments and cannot detect these subtle changes at corners.
For high-speed signals, impedance at these points can deviate by more than 10%, creating a hidden failure point.
Specification Requirement: The line width in all corner areas must be the same as that of straight segments, with no narrowing or distortion.
Detail 2: Consecutive Corners Cause Signal Propagation Delay Irregularities:
Frequent backtracking and multiple turns in high-speed signal traces lead to the accumulation of parasitic capacitance and inductance, increasing signal propagation delay deviations and reducing timing margins.
This is particularly true for DDR data and clock signals, where consecutive turns can compromise timing matching accuracy and trigger random sampling errors.
Specification Requirement: A single high-speed trace must have no more than three bends; avoid continuous, dense back-and-forth routing.
Detail 3: Asymmetrical Differential Pair Bends and Excessive Intra-pair Skew:
When routing differential signals, if one side of the pair has many bends while the other remains straight, this causes inconsistencies in intra-pair trace length and parasitic parameters, resulting in phase skew, a surge in common-mode noise, and EMC radiation exceeding limits.
Specification Requirement: Differential pair bends must be symmetrical and synchronized, with the number and positions of bends being exactly the same on both sides.
Trace Width Design: Beyond Meeting Current-Carrying Capacity—90% of Engineers Overlook Consistency and Application-Specific Adaptation
Trace width is a fundamental parameter in PCB routing.
Most engineers calculate trace width based solely on current magnitude, focusing only on meeting basic current-carrying requirements, while neglecting core details such as trace width consistency, high-speed impedance matching, manufacturing process limits, and transition methods between wide and narrow traces.
This leads to issues such as abnormal power supply temperature rise, high-speed impedance drift, and decreased mass production yield.
Trace width design is divided into two major categories: power trace width and signal trace width.
The design logic for these two is completely different and should not be intermixed.
Common Misconceptions and Standards for Power Trace Width (Major Pitfalls in Mass Production)
The core objectives for power trace width are sufficient current-carrying capacity, controllable temperature rise, compliance with voltage drop standards, and the absence of local bottlenecks.
Industry-standard practices follow the IPC-2221 specification, calculating trace width based on copper thickness, trace length, and temperature rise thresholds—rather than blindly widening or narrowing traces.
High-Frequency Misconception: While most of a power trace has sufficient width, narrowing the trace in specific areas to avoid components creates a “trace width bottleneck.”
The current-carrying capacity of these narrow sections drops sharply, leading to localized heat buildup during high-current operation.
Long-term high temperatures cause oxidation, resulting in trace breaks and board burnout—a major cause of mass equipment failures.
Hidden Details of High-Speed Signal Trace Width (Key to High-Speed Design)
For high-speed signal traces, trace width is not determined by current-carrying capacity; the core focus is on maintaining impedance consistency.
In high-speed 5002 single-ended and 10002 differential trace layouts, trace width directly determines the impedance value.
Any change in trace width at any point will cause impedance discontinuity, leading to signal reflections and eye diagram collapse.
Transitions between wide and narrow sections must use a smooth tapered transition with a transition length of at least three times the trace width to eliminate right-angle step changes and minimize impedance fluctuations.
Additionally, the trace width must remain uniform throughout the entire high-speed route, without any local adjustments, narrowing, or widening.
Comparison Table of Current-Carrying Parameters for Standard Thick Copper Traces (IPC Standard for Mass Production)
PCB Copper Thickness and Trace Width Specifications
| Copper Thickness | Trace Type | Minimum Trace Width (Manufacturing Limit) | Trace Width for 1A Current | Maximum Current Capacity | Typical Applications |
|---|---|---|---|---|---|
| 1 oz (Standard 1.5 mil) | Outer-Layer Signal Traces | 0.1 mm (4 mil) | 1.0 mm | 8 A (10 mm trace width) | Surface-layer routing in consumer electronics |
| 1 oz (Standard 1.5 mil) | Inner-Layer Signal Traces | 0.12 mm (5 mil) | 1.2 mm | 6 A (10 mm trace width) | Internal power and signal routing in electronic devices |
| 2 oz (Thick Copper, 3 mil) | Outer-Layer Power Traces | 0.15 mm (6 mil) | 0.5 mm | 15 A (10 mm trace width) | Industrial equipment and high-power power supplies |
| 0.5 oz (Thin Copper, 0.75 mil) | Precision Signal Traces | 0.08 mm (3 mil) | 2.0 mm | 3 A (10 mm trace width) | High-precision, miniaturized PCBs |
PCB Copper Thickness and Trace Width Specifications
Summary of Eight Common High-Frequency Pitfalls in Trace Width Design
1. Localized trace width bottlenecks: Local narrowing of power traces results in insufficient current-carrying capacity, causing localized overheating and trace burnout;
2. Inconsistent high-speed trace widths: Inconsistent trace widths at the beginning and end of high-speed traces lead to breaks in impedance continuity;
3. Abrupt transitions between wide and narrow trace widths: A lack of tapered transitions and sudden changes in trace width cause signal reflections;
4. Mixed trace widths on inner and outer layers: Ignoring the difference in heat dissipation between inner and outer layers;
Inner-layer trace widths are not widened, resulting in excessive temperature rise;
5. Blindly widening trace widths: Unnecessarily widening high-speed traces increases parasitic capacitance and affects signal timing;
6. Trace width contraction at corners: Corner traces become squeezed and deformed, creating hidden “necks” that cause impedance drift;
7. Ignoring process limits: Trace widths smaller than the factory’s process capability lead to batch-wide open circuits and copper deficiency defects;
8. Fine-tuning high-frequency and RF trace widths: Arbitrarily changing the width of RF traces completely compromises impedance matching.
Trace Spacing Design: Passing DRC Does Not Guarantee Mass Production Compliance; Solder Mask Bridges Are the Most Common Cause of Failure
Trace spacing is the detail most frequently associated with PCB mass production failures.
The vast majority of engineers rely on software DRC spacing checks, unaware that DRC verifies design spacing, whereas mass production depends on actual solder mask spacing and process tolerance margins.
Design spacing that is exactly at the process threshold can lead to batch failures such as solder mask bridging collapse, solder slag bridging, moisture-induced leakage, and high-voltage breakdown.
This is the most insidious detail pitfall in layout design and the one with the highest remediation costs.
Key Concept in Trace Spacing Design: Distinguishing Between Design Spacing and Mass Production Spacing
The minimum spacing specified by DRC in standard PCB design is merely a theoretical design value that does not account for process variables such as etching deviations, solder mask offset, solder paste thickness, and moisture absorption in the board material.
Under standard manufacturing processes at typical factories, trace spacing may vary by ±0.05 mm, and the solder mask ink shrinks inward during curing.
If the design spacing lacks a margin of safety, defects will inevitably occur during mass production.
Among these, the risk of solder mask bridges is the industry’s biggest blind spot: the minimum effective width between the solder mask protective layers of two adjacent traces is referred to as the solder mask bridge.
Under standard processes, the minimum width of a solder mask bridge must be 0.1 mm (4 mil).
If the design spacing is too small and the solder mask bridge is missing, the adjacent copper foil lacks insulation protection.
This makes it prone to short circuits caused by solder dross bridging during the SMT reflow process, and in humid environments, leakage and crosstalk are significantly exacerbated.
Comprehensive Trace Spacing Compliance Standards Comparison Table (Mass Production Level)
PCB Trace Spacing Design Guidelines
| Trace Spacing Scenario | Minimum DRC Design Value | Safe Spacing for Mass Production | Solder Mask Bridge Requirements | Potential Failure Risks |
|---|---|---|---|---|
| General Signal Trace to Signal Trace | 0.1 mm | ≥ 0.15 mm | ≥ 0.1 mm | Current leakage due to insufficient spacing and minor electrical interference. |
| Signal Trace to Power Trace | 0.12 mm | ≥ 0.2 mm | ≥ 0.12 mm | Power supply noise coupling into signal traces and short circuits. |
| High-Voltage Trace to Low-Voltage Trace | 0.3 mm | ≥ 0.5 mm | Maintain complete solder mask isolation along the entire routing path. | Creepage breakdown, arcing, and equipment damage. |
| Spacing Within High-Speed Differential Pairs | Fixed value calculated according to impedance requirements. | Maintain consistent spacing throughout the routing path without deviation. | Arbitrary widening or narrowing is prohibited. | Impedance imbalance and excessive common-mode noise. |
| Isolation Spacing Between High-Speed Signal Groups | Minimum spacing based on the 3W rule. | ≥ 5W spacing recommended. | Maintain complete ground isolation or shielding. | High-speed crosstalk, bit errors, and failure to meet EMC requirements. |
PCB Trace Spacing Design Guidelines
The Four Most Easily Overlooked Hidden Details in Trace Spacing
Detail 1: Insufficient Trace Spacing at Corners:
While the spacing between parallel traces meets standards, the spacing narrows at corner areas, creating localized blind spots that DRC cannot detect.
This can easily lead to short circuits caused by solder bridging at corners during mass production.
An additional 0.05 mm spacing margin must be reserved for all corner areas.
Detail 2: Inconsistent Spacing Between Long and Short Traces:
While spacing for short traces meets standards, spacing between long parallel traces is compressed.
This leads to cumulative crosstalk over long distances, making high-speed signals highly prone to hidden bit errors.
The longer the parallel section, the greater the spacing margin required.
Detail 3: Non-compliant Board-edge Trace Spacing:
There is no spacing margin for traces in the board-edge area; force-induced displacement during panel cutting can cause adjacent traces to short-circuit.
Traces within 5 mm of the board edge must have increased spacing to keep them away from the cutting area.
Detail 4: Insufficient Spacing Between Vias and Traces:
The spacing around vias is too tight, solder mask openings overlap, and solder paste accumulates during production, causing micro-short circuits between vias and traces.
The clear space around vias must be greater than the standard trace spacing.
Case Study: Comprehensive Analysis of Faults Involving Corners, Trace Width, and Trace Spacing (Real-World Mass Production Issues)
Case 1: 90-Degree Right-Angle Corners and Localized Trace Width Bottlenecks Causing Power Supply Board Burnouts
During mass production of a certain industrial control power supply board, 30% of the units experienced system crashes under full load and high temperatures, along with localized trace burnouts.
Inspection of the power supply chip and filter capacitors revealed no abnormalities.
PCB analysis revealed that the 12V high-current power lines contained multiple 90-degree right-angle bends.
Additionally, the trace width was locally narrowed at these bends to avoid components, creating a current-carrying bottleneck.
Current concentrated at the right-angle bends, resulting in insufficient local current-carrying capacity.
Prolonged full-load operation caused high-temperature oxidation, ultimately leading to the traces burning out.
Remedial Measures: All right-angle bends in the power lines were modified to 45° chamfers; localized track width reductions were eliminated;
Track width was standardized throughout the circuit; and critical high-current paths were appropriately widened.
Following these modifications, batch production achieved zero failures, and the temperature rise decreased by 15°C.
Case 2: Missing Solder Mask Bridges at Critical Line Spacing Leading to Moisture-Induced Leakage
A certain smart home product operated normally in dry environments but experienced widespread screen blackouts and system freezes during the rainy season.
Inspection revealed that the signal line spacing was designed at 0.1 mm—exactly at the process threshold.
During mass production, the solder mask bridges collapsed, allowing moist air to enter the gaps between traces.
This caused leakage between adjacent traces and excessive crosstalk, triggering system malfunctions.
Remediation Plan: The spacing for all standard signal traces was uniformly increased to 0.15 mm to ensure the integrity of the solder mask bridges.
Spacing for high-voltage and sensitive signal traces was further increased.
Following the remediation, the product passed stability testing under all temperature and humidity conditions.
Case 3: Abrupt Width Changes and Asymmetrical Corners in High-Speed Traces Lead to Eye Diagram Failure
A USB 3.0 high-speed interface experienced transmission speed drops and eye diagram closure, with no obvious short circuits or open circuits.
A post-analysis revealed that the trace width narrowed abruptly at the entry point of the differential pair, and multiple corners on one side of the differential pair were asymmetrical.
This caused impedance imbalance and phase skew, severely degrading high-speed signal integrity.
Remedial Measures: The abrupt transition in trace width was modified to a smooth tapered transition.
The corners of the differential traces were modified to be symmetrical and synchronized, ensuring equal spacing and equal length throughout the entire route.
After optimization, the eye diagram margin returned to the standard value, and high-speed transmission became stable with no speed drops.
Standardized Design Process for Production-Grade Layout Details (Zero Errors)
To completely eliminate design flaws related to corners, trace widths, and trace spacing, this document establishes standardized guidelines covering the entire process—from pre-routing, through routing, to post-routing—applicable to all high- and low-speed PCB projects and ready for immediate implementation and reuse.
Step 1: Preliminary Parameter Settings:
Based on board copper thickness, current requirements, and high-speed impedance specifications, predefine global minimum trace widths, safe trace spacing, and corner specifications.
Arbitrary modifications to these parameters during later stages are prohibited.
Step 2: Routing Priority Guidelines:
Prioritize routing for high-speed, high-voltage, and high-current traces.
Use smooth corners, uniform trace widths, and safe spacing throughout the process to eliminate detail distortions caused by later modifications to avoid obstacles.
Step 3: Real-Time Detail Control:
During routing, eliminate right angles and sharp corners; prohibit local narrowing of trace widths; avoid critical clearances;
And ensure high-speed traces remain symmetrical, smooth, and consistent.
Step 4: Global Detail Optimization:
Uniformly correct all non-compliant corners; apply tapered transitions for all width changes; add sufficient clearance for solder mask bridges;
And correct clearance blind spots at corners, board edges, and around vias.
Step 5: Specialized Detail Verification:
Do not rely solely on DRC checks;
Conduct manual, specialized inspections of corner shapes, trace width consistency, critical clearances, and solder mask integrity to thoroughly identify hidden defects.
Summary
The core gap in PCB layout design does not lie in complex high-speed impedance or equal-length designs, but rather in the standardization of fundamental details and mass-production-oriented quality control.
Corners, trace widths, and trace spacing may seem like basic entry-level concepts, but they are the key dividing line between amateur drawings and professional mass-production designs.
Entry-level engineers focus solely on routing connectivity, DRC compliance, and a neat appearance, while seasoned mass-production engineers place greater emphasis on process adaptability, consistency in details, sufficient margins, and long-term stability.
Neglecting these details can lead to various complex failures in mass production, such as short circuits, current leakage, overheating, high-speed bit errors, and EMC non-compliance.
The core logic behind all these detailed specifications can be summarized as follows:
Smooth corners without abrupt changes, uniform trace widths without bottlenecks, trace spacing with sufficient margin to ensure manufacturability, and scenario-specific adaptations.
A comprehensive grasp of the full-range detailed specifications and tabulated standards proposed in this article can resolve more than 95% of common defects in PCB mass production.
This approach substantially enhances the stability, operational reliability, and manufacturing yield of PCB design and fabrication.
It also helps establish a standardized, professional, and rigorous layout design paradigm.
Furthermore, it effectively eliminates additional costs caused by engineering rework and mass production troubleshooting.