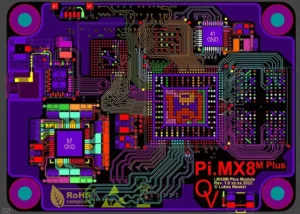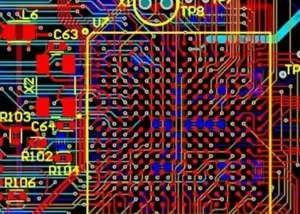
PCBs (Printed Circuit Boards) are often referred to as the “mother of electronic products.” From cell phones and computers to automobiles and spacecraft, virtually all electronic devices rely on them.
They provide mechanical support and electrical interconnections for components such as chips, resistors, and capacitors, serving as the cornerstone of the modern electronics industry.
This article systematically presents the detailed classification system of PCBs. It follows a real-world production line as the research basis.
Then it dissects the full manufacturing workflow of a multilayer board step-by-step.
We supplement the content with illustrated diagrams. These illustrations incorporate real‑scene photos captured across the whole production procedure.
It is a valuable resource for engineers, procurement professionals, and electronics enthusiasts alike.
Detailed Classification of PCBs
Classification by Number of Conductive Layers
Single‑sided: Copper foil traces appear on only one side, while technicians mount components on the other side.
This is the simplest and least expensive structure, commonly used in simple circuits such as remote controls, LED lights, and small household appliances.
Double-Sided: Both sides feature copper foil circuits, with interlayer connectivity achieved through plated-through holes (PTH).
This design doubles the routing density and is the primary board type used in consumer electronics.
Multilayer Boards: 4 layers, 6 layers, 8 layers… up to 50 layers or more.
These are formed by alternately laminating multiple inner core layers and prepreg sheets.
They contain dedicated power and ground layers, ensuring good signal integrity, and are used in servers, communication equipment, and high-end motherboards.
HDI (High-Density Interconnect) Boards: Utilizing laser-drilled micro-blind vias, buried vias, and lamination processes, these boards achieve line widths and spacing of 40/40 μm or less.
The “Anylayer” interconnection design is the mainstream solution for smartphone motherboards.
Classification by Substrate Material
FR-4 Epoxy Glass Fiber Board: The absolute industry standard.
Made by impregnating glass fiber cloth with epoxy resin, it offers high mechanical strength, excellent insulation properties, and a favorable cost-performance ratio.
Its Tg (glass transition temperature) ranges from 130°C to 180°C.
Metal Substrates (Aluminum-based/Copper-based): High thermal conductivity (1–8 W/m·K), specifically designed for heat dissipation; standard in LED lighting and power modules.
Ceramic Substrates: Made of aluminum oxide or aluminum nitride, they are heat-resistant and have a coefficient of thermal expansion that matches that of the chip; used in high-power modules and automotive electronics.
Flexible Printed Circuits (FPC): Built on polyimide (PI) substrate, they support bending and rolling, and find broad application in mobile phone flex cables, camera modules, and wearable devices.
Rigid-Flex Boards: The rigid section carries components, while the flexible section provides three-dimensional interconnections, eliminating the need for connectors and offering extremely high reliability;
They are commonly found in military, medical, and flagship mobile phone applications.
Classified by Special Processes and Applications
High-Frequency, High-Speed Boards: Made from low-dielectric-constant materials such as Rogers and PTFE (Teflon), these are used in 5G base stations and millimeter-wave radar.
Thick-Copper Boards: With copper thickness ranging from 3 oz to 20 oz, these boards handle high currents and are used in power supplies and electric vehicle control systems.
Buried and Blind Via Boards / IC Substrates: Representing the pinnacle of precision interconnect technology, IC substrates feature line widths as narrow as 8–12 μm and serve as critical materials for chip packaging.
Quick Reference Table of Common PCB Types.
| Type | Number of Layers | Typical Applications |
|---|---|---|
| Single-Sided PCB | 1 | Home Appliances, LEDs, Toys |
| Double-Sided PCB | 2 | Industrial Control, Power Supplies, Consumer Electronics |
| Multilayer PCB | 4–50+ | Servers, Telecommunications, Motherboards |
| HDI PCB | 4–20+ | Smartphones, Tablets, Wearables |
| Flexible PCB (FPC) | 1–8 | Wiring, Modules, Foldable Devices |
| Rigid-Flex PCB | 2–20+ | Military & Defense, Medical Devices, Flagship Smartphones |
An Illustrated Guide to the Entire PCB Manufacturing Process
Using a green solder mask multilayer board as an example, we’ll walk through all 13 core processes from the copper-clad laminate to the finished product.
Thirteen transformations of the same board.
STEP 01
The task is to process large copper-clad laminate (CCL) sheets. The common size of such sheets is 1020 × 1220 mm.
Workers cut these large sheets into production panels of specified dimensions per the production order. Edge grinding and chamfering are also performed.
These treatments avoid scratches on equipment and panel surfaces in subsequent procedures.
Key Process Points: Cutting dimensional accuracy of ±0.5 mm; burrs on board edges must be thoroughly sanded away;
Bake-drying (120°C/4 hours) to prevent delamination and bubbling in subsequent processes. Material utilization (layout optimization) directly impacts costs.
STEP 02
Process: Operators apply a photosensitive dry film to the copper surface of the inner‑layer core board.
The film receives UV-light exposure through a photographic negative (film).
Operators subsequently perform development, etching and dry‑film stripping on DES lines.
By these means, the designed inner-layer circuit is “printed” onto the copper surface.
Key Process Points: Exposure energy and development speed determine line width accuracy;
The etch factor controls side etching; standard inner layer line widths and spacing are typically 3/3 mil (75/75 μm).
Upon completion, operators perform an AOI (Automated Optical Inspection) scan to detect defects in the inner‑layer circuits.
STEP 03
Purpose: The inner copper surface is too smooth, and direct lamination would result in poor adhesion.
The browning process uses chemical micro-etching to grow a velvety layer of cuprous oxide on the copper surface, turning it into a uniform brownish color and significantly increasing the surface area.
Process Key Points: Operators must control the etching depth between 1.0 and 1.5 μm;
The browning film must be uniform, dense, and highly acid-resistant to prevent the “pink ring” defect from appearing after lamination.
This step directly determines the interlayer bond strength of the multilayer board.
STEP 04
Process: Stack the inner core layer, prepreg (PP sheet), and outer copper foil in the “copper foil-PP-core layer-PP-copper foil” configuration.
After positioning with rivets, the stack is fed into a vacuum hot press.
Under high temperature and pressure, the PP melts and cures, compressing multiple loose sheets into a single, solid multilayer board.
Key Process Points: A typical lamination profile is 180°C for 90 minutes at a pressure of 350–400 psi;
A vacuum environment is used to remove air bubbles; interlayer alignment accuracy must be within ±50 μm;
Otherwise, the inner layer circuits will “misalign and interfere with each other.”
STEP 05
图5
What is done: Using a high-speed CNC drilling machine (spindle speed 150,000–200,000 rpm), component holes, vias, and positioning holes are drilled into the board surface.
A single motherboard often requires tens of thousands of holes, making this one of the most “impressive” processes in a PCB factory.
Key Process Points: The minimum hole diameter for mechanical drilling is approximately 0.15 mm;
Smaller holes are drilled using a laser drill (HDI microvias: 0.05–0.1 mm).
Operators must keep hole position accuracy within ±0.05 mm and manage hole‑wall roughness, as drill chips and “pinheads” can affect the quality of subsequent hole metallization.
STEP 06
Process: The walls of drilled holes are made of insulating resin and need to be “coated.”
Chemical copper plating proceeds in two main stages. First, operators deposit a 0.3–0.5 μm conductive copper layer onto the hole walls.
Subsequently, full-board electroplating thickens this copper layer to 20–25 μm.
This realizes electrical continuity between the upper and lower layers. Such holes are known as PTH metallized holes.
Process Key Points: Desmearing ensures the hole walls are clean; uniformity of the copper plating thickness and the ductility of the copper in the holes are critical to reliability.
The process is considered qualified only if the holes remain intact after thermal shock testing (288°C/10 s × 3 times).
STEP 07
This process shares similarities with inner-layer fabrication. Operators first laminate a dry film onto the board surface.
Subsequent steps include exposure and development. Then operators carry out pattern plating.
This step thickens copper within circuit regions and deposits tin plating to serve as a resist layer.
After that, operators conduct film stripping, etching, and tin removal. These operations finally form complete circuits and pads on the outer copper layer.
Process Highlights: The “negative/positive” process route is used;
The standard outer layer line width and spacing are 4/4 mil; after etching, the board undergoes AOI inspection to detect defects such as open circuits, short circuits, and notches.
STEP 08
What it does: Liquid photosensitive solder mask ink (most famously known as “PCB green”) is printed onto the board surface.
After exposure and development, operators expose only the pads to be soldered, while the ink completely covers and protects the rest of the circuit.
This is how our boards get their iconic green coating.
Key Process Requirements: Solder mask bridge width ≥3 mil to prevent solder bridges; ink thickness 10–25 μm; after curing, the board must pass adhesion (cross-hat test) and insulation tests.
In addition to green, other colors such as blue, red, black, and white are available.
STEP 09
This step adopts either screen printing or inkjet printing. Operators print white component part numbers such as R1, C2 and U3 onto the board surface.
Operators also print polarity markings, the company logo and production date at the same time.
These printed contents act as a reference map. They offer guidance for subsequent assembly and repair work.
These are the key process points. The character height is normally no less than 0.8 mm. The line width should be at least 0.15 mm.
Printed patterns must not overlap with pads. Overlapping prints would otherwise trigger soldering defects.
Inkjet printing features higher precision and requires no screen masks. For these advantages, it is gradually replacing conventional screen printing.
STEP 10
What to Do: Exposed copper pads are highly susceptible to oxidation and must be coated with a “protective layer.”
The illustration shows the electroless nickel‑immersion gold (ENIG) process: first, operators deposit electroless nickel (3–6 μm), followed by electroless gold (0.05–0.1 μm), producing pads with a bright golden appearance.
Comparison of Common Processes: Hot-air solder leveling (HASL) is inexpensive but results in an uneven finish;
Electroless gold plating is smooth and wear-resistant, making it suitable for fine-pitch BGAs; electroless silver/tin plating offers moderate cost;
OSP (organic solderability preservative) is the most economical option; and electro-hard gold is used for gold finger plug and unplug areas.
STEP 11
Process: Use a CNC milling machine to mill individual PCBs from a large production panel along the designed outline, while simultaneously machining slots, holes, and irregular edges.
For regular panel layouts, a V-CUT panel-splitting machine can be used to pre-cut separation lines, facilitating manual panel separation after surface-mount assembly.
Process Key Points: The standard contour tolerance is ±0.1 mm;
Cutter life and feed rate affect burrs on the board edges; a combination of stamp holes and V-CUT is a common solution for mass production.
STEP 12
What to Do: Compare the design netlist and verify the electrical continuity of each board point by point:
Connections that should be continuous must not be broken (open-circuit testing), and connections that should not be continuous must not be made (short-circuit testing).
The flying probe tester shown in the figure uses multiple high-speed probes to make point-by-point contact during testing.
These are the key process points. Flying probe testing delivers good flexibility.
It fits prototype manufacturing and small-batch production scenarios. For high-volume production, dedicated probe bed fixtures are adopted.
These fixtures perform open-circuit and short-circuit testing.
Tens of thousands of test points across the whole board can be checked within one single press cycle. This method achieves extremely high testing efficiency.
Test voltage: 50–300 V; insulation resistance: ≥100 MΩ.
STEP 13
What to Do: The final step before shipment: a full visual inspection (checking for exposed copper under solder mask, blurred markings, damaged board edges, contamination, and scratches);
Measuring the board’s dimensions and hole diameters; and verifying quantities and markings.
After passing inspection, the boards are vacuum-packed (with desiccant and humidity cards inside) and labeled with traceability tags.
Key Process Points: Classified into Class 1, 2, or 3 according to the IPC-A-600 acceptance criteria;
Reliability testing includes thermal shock, ion contamination, and solderability tests.
At this point, a multilayer PCB is officially ready to move on to the SMT assembly line.
HDI Boards vs. Standard Multilayer Boards: What’s the Difference?
Many people hold a simple view of HDI. They regard it merely as a denser variant of standard PCBs.
In fact, the two differ across multiple dimensions. These dimensions cover drilling approaches, layer structures and manufacturing workflows.
They correspond to two entirely separate manufacturing systems.
Key Difference 1: Hole Drilling Method
Standard PCB: Mechanically drilled holes that pass through the entire board (through-holes), with a minimum diameter of approximately 0.15 mm.
The hole rings occupy a large area, resembling “sky-reaching pillars” that consume a significant amount of routing space.
HDI Boards: CO₂ or UV lasers are used to create blind vias (connecting only the outer layer to the inner layers) and buried vias (connecting only inner layers to each other).
With hole diameters ranging from 0.05 to 0.1 mm, these vias do not span all layers, freeing up space on the outer layers for more traces and additional BGA pads.
Key Difference 2: Build-up Process
Conventional multilayer boards adopt a single-press molding process.
By contrast, HDI builds up dielectric material and copper foil on both sides of the core board.
Each additional layer requires a full sequence of repeated operations.
These operations include laser drilling, electroless copper plating, and pattern transfer.
The commonly referred to 1st-, 2nd-, and 3rd-order HDI boards refer to the number of blind via layers stacked on a single side;
“Anylayer” interconnection allows direct microvia connections between any two layers and is a standard feature on flagship smartphone motherboards.
The trade-off is clear: with each increase in order level, the manufacturing process adds another cycle, yield rates drop slightly, and the price rises significantly.
An 8-layer Anylayer HDI board can cost 3 to 5 times as much as a standard board with the same number of layers.
Key Difference 3: Wiring Density and Design Capabilities
Standard board trace widths and spacing are typically 4/4 mil (100/100 μm); HDI boards can achieve 2.4/2.4 mil (60/60 μm) or even finer.
For BGA chips with a 0.4 mm pitch, standard boards cannot route traces between pads;
Instead, they rely on HDI blind vias to “escape vertically” directly beneath the pads (VIPPO / Via-in-Pad technology), which is key to the miniaturization of smartphone motherboards.
Understand the Differences at a Glance with This Table
| Comparison Item | Conventional Multilayer PCB | HDI PCB |
|---|---|---|
| Hole Types | Mechanical through-holes | Laser blind vias / buried vias / via-in-pad |
| Minimum Hole Diameter | ≈ 0.15 mm | 0.05–0.1 mm |
| Line Width / Line Spacing | 4/4 mil, standard | From 2.4/2.4 mil |
| Number of Lamination Cycles | 1 cycle | Multiple sequential lamination cycles |
| BGA Support | ≥ 0.8 mm pitch | 0.35–0.4 mm pitch |
| Relative Cost | 1× | 2–5× |
| Typical Applications | Industrial controls, home appliances, conventional mainboards | Smartphones, tablets, flagship wearables, modules |
How to choose? A one-line tip:
If the main chip is a QFP or large BGA with a pitch of 0.5 mm or greater, and there’s plenty of space on the board → A standard multilayer board will suffice; don’t waste your money.
If you’re using a 0.4 mm BGA and the board needs to fit into a pocket-sized enclosure → Stick with HDI, and if you can replace layers with blind vias, don’t force extra layers.
Key PCB Parameters You Must Understand Before Placing an Order
Trace Width / Spacing (Trace / Space)
The narrowest trace width and the minimum spacing between adjacent traces, measured in mils or micrometers (1 mil = 25.4 μm).
The smaller the values, the higher the cost; for standard mass production, 4/4 mil offers the best value for money.
Aspect Ratio
Board thickness ÷ hole diameter. For a 1.6 mm board with a 0.2 mm hole, the aspect ratio is 8:1.
The higher the ratio, the more difficult it is to achieve uniform copper plating in the hole.
Most manufacturers set an upper limit of approximately 10:1; exceeding this limit will incur additional charges or require a design change.
Copper Thickness (oz)
1 oz ≈ 35 μm copper foil thickness. Signal boards start at 1 oz;
For power boards and high-current applications, select 2–4 oz copper thickness, as the current-carrying capacity is approximately proportional to the copper thickness.
Tg (Glass Transition Temperature)
The temperature at which the board transitions from a “glass-like state” to a “rubber-like state.”
The peak temperature for lead-free reflow soldering ranges from 245 to 260°C.
It is recommended to select materials with a medium-to-high Tg (Tg ≥ 150°C) to prevent delamination and board rupture during soldering.
Dielectric Constant Dk / Damping Factor Df
These determine how fast a signal travels through the board and how much it attenuates.
For FR-4, Dk ≈ 4.2 and Df ≈ 0.02; for high-frequency designs such as 5G or radar, it is necessary to switch to low-Dk/Df materials like Rogers, but the cost increases several-fold.
IPC Acceptance Levels (Levels 1/2/3)
Level 1: General-purpose electronic products; Level 2: Special-purpose electronic equipment (default);
Level 3: High-reliability products (medical, aerospace, and automotive safety components).
The higher the level, the stricter the acceptance criteria, such as via copper thickness and alignment accuracy.
Surface Treatment Processes
| Process | Advantages | Disadvantages | Suitable Applications |
|---|---|---|---|
| HASL (Hot Air Solder Leveling) | Low cost, good solderability, good storage stability | Uneven surface, not suitable for fine-pitch applications | Through-hole components, low-cost PCBs |
| Lead-Free HASL | RoHS compliant, low cost | Surface flatness is still average, greater thermal shock | General consumer electronics |
| ENIG (Electroless Nickel Immersion Gold) | Extremely flat, oxidation resistant, suitable for wire bonding | Expensive; risk of “black pad” requires process control | BGA/fine-pitch applications, gold-finger contact surfaces |
| Immersion Silver | Flat, excellent solderability, moderate cost | Prone to discoloration/tarnishing; requires quick soldering | High-frequency PCBs, fine-pitch applications |
| OSP (Organic Solderability Preservative) | Lowest cost, flat surface, simple process | Not suitable for multiple reflow cycles, poor storage stability | Consumer electronics requiring rapid soldering |
| Hard Gold (Electroplated Hard Gold) | Highly wear-resistant, withstands repeated insertion/removal | Expensive, poor solderability | Gold fingers, connector contacts |
Rule of thumb: For components with a pitch of less than 0.5 mm → electroless gold or silver plating;
For low-cost, purely through-hole assemblies → spray tinning; for boards that are soldered quickly and on a budget → OSP.
Summary
Behind a seemingly ordinary green circuit board lies the precise coordination of 13 core processes and hundreds of process parameters:
The first step is cutting to size. Next comes internal-layer routing.
Then lamination is performed with a browning layer to define the board structure.
Drilling and electroplating follow to build interlayer connections. Solder-mask characters are applied to determine the outer appearance.
Surface treatment is carried out to guarantee solderability. Molding, electrical testing and final inspection are implemented in sequence.
These final steps serve for quality assurance.
The next time you pick up a PCB, you’ll know that every trace and every via on it has undergone a remarkable journey.