Before laminating multilayer boards, the copper surfaces of the inner layers are typically brown-treated first. This name actually tends to draw people’s attention to the color—“Browning”—doesn’t that imply a color change?
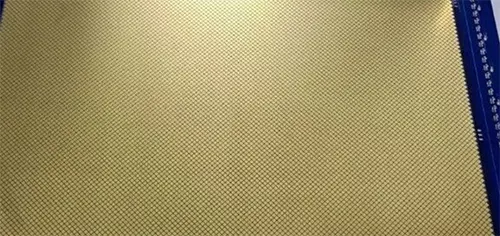
In fact, the brown color is merely a characteristic of the treated surface.
You can think of it this way:
“Browning” refers to “preparing the copper surface before pressing,” which is more accurate.
Copper Surfaces Cannot Be Bonded Directly
In multilayer PCBs, after the inner layer circuits undergo development, etching, and stripping, oxides, fingerprints, grease, or dry or wet film residues may remain on the copper surface and the sidewalls of the circuits.
Even after operators clean the surface, an improperly roughened copper surface may fail to form a sufficient bond with the cured resin of the bonding sheet.
A press can bond the inner layer core board and the bonding sheet together, but it cannot replace proper copper surface treatment.
Insufficient interlayer bonding often does not manifest immediately on the browning line but becomes apparent during subsequent processing or when exposed to heat.
Operators perform the browning process between inner layer circuit fabrication and lamination.
It first cleans the copper surface, then alters its microstructure through micro-etching, while simultaneously forming a very thin organic film to create the conditions necessary for bonding between the copper and the resin.
What Exactly Does Browning Do?
A typical organic micro-etching browning process includes:
Acid pickling → Alkaline degreasing → Pre-soaking → Browning → Water rinsing → Drying
Acid pickling: Removes oxides from the copper surface
Alkaline degreasing: Removes grease and residual film
Pre-soaking: Ensures that organic additives adsorb more evenly onto the copper surface, preparing it for subsequent micro-etching and film formation.
Upon entering the browning tank, the micro-etching reaction creates a fine, rough texture along the copper grain boundaries.
Organic additives simultaneously participate in the reaction, forming an extremely thin organic film on the copper surface.
The microscopic roughness of the copper surface and this film jointly influence the bond strength after lamination.
This film continues to change even after it has formed.
Film formation and dissolution occur simultaneously in the tank; the old film dissolves while a new film continues to form.
An unbalanced bath solution affects both film thickness and uniformity.
Browning Solves the Blackening Problem
Traditional blackening involves forming a needle-like, velvety structure of copper oxide and cuprous oxide on the copper surface.
While this improves the bond between the copper surface and the resin, the needle-like crystals are brittle, posing a risk of the velvety structure breaking and adhesion decreasing under high temperatures and pressures.
Traditional blackening involves higher bath temperatures and the use of strongly alkaline solutions.
Organic micro-etching browning, on the other hand, employs a micro-etching plus organic film treatment method, operates at lower temperatures, and does not rely on strongly alkaline corrosive substances.
Horizontal equipment also reduces issues such as stacking or damage to thin inner-layer boards on vertical racks.
This treatment method is more suitable for high-density interconnect (HDI) boards and thin inner-layer boards.
Browning Passed
It’s not that simple.
If the copper surface is too smooth, adhesion may be insufficient; if the surface is excessively roughened or the coating is too thick, peel strength may also decrease.
Operators can assess color and uniformity via on-site visual inspection, but this method cannot replace peel strength, thermal stress, or “pink ring” phenomenon tests.
Inadequate pretreatment, abnormal bath concentration or activity, and insufficient rinsing and drying can all affect the browning results.
Problems may also arise after lamination if the material is left for too long after browning and absorbs moisture, or if the laminate itself becomes damp.
When assessing browning on-site, you can’t just ask whether the color is correct.
You also need to check whether the copper surface is clean, whether the etching is appropriate, whether the plating layer is uniform, and whether the laminated board can pass the corresponding reliability tests.
Conclusion
Browning is much more than a process for changing the color of copper surfaces.
It prepares the inner-layer copper for lamination by cleaning the surface, creating controlled micro-roughness, and forming a thin organic film that helps the copper bond securely with the resin.
The key to a successful browning process is not simply achieving a uniform brown appearance.
Operators must control the entire process, including surface pretreatment, micro-etching, chemical activity, rinsing, drying, and the time between browning and lamination.
Ultimately, the quality of the treated copper surface determines how reliably the inner layers bond during lamination.
A well-controlled browning process helps maintain sufficient peel strength, thermal reliability, and long-term multilayer PCB performance.